Skip to content


Scalp Bleach & Root Colour Transformation
When a client is looking for a dramatic transformation, such as vibrant roots, the journey to achieving this colour must begin with perfecting the base, and ensure that this is the perfect foundation for a bright and vibrant root.
In this case, our client has pre-lightened highlighted hair, therefore in order to achieve the finished look she desires, we are going to need to transition her hair from highlights to a full scalp bleach, known as “long regrowth” before we can begin colouring the roots. Always ensure you have performed a skin test before undertaking any colour and lightening treatments on a client.
In order to perform the scalp bleach, the hair will need to be processed in sections to control the development time and to keep a close eye on the condition of the hair. To begin, you will need to section your client's hair into a hot cross bun.


Starting with the back left section, take small slices of hair, and apply your lightener. We are using 30g powder, 60g developer and 3g olaplex in order to retain the quality of the hair as best we can. We will be lightening the mid-lengths and ends of the hair first, before applying the formula to the roots, as the heat from the scalp will speed up the developing process, meaning the roots need a shorter development time. When performing an all-over bleach like this, you will need to ensure your formula is super thick, with a texture similar to buttercream. You must ensure that the hair is FULLY saturated, and using a balayage board can help with this. Once you have finished each section, check underneath to ensure the product has been applied all the way through and is touching every strand.


Once you have applied the product to all of the mid-lengths and ends of your first section, you can go back through the hair and apply the product to the root. As this is such an intensive lighting process, you will need to make sure you are continually checking how the colour is lifting, and the quality of the hair. You can do this by performing an elasticity health check on the strands that have been developing the longest, and if there are any signs of damage, the bleach needs to be rinsed immediately.
Once the section is fully saturated with the product and the colour has lifted to where you would like it, rinse the client's hair with cool water to soothe the scalp, and then apply Olaplex to help with the hair's health. Now you have completed your first section, you can move onto the next, repeating the exact same process, section by section but leaving out the hairline, until all 4 sections are lightened.
If you have a client with virgin hair, you may be able to do more than one section before needing to rinse the product off, however, it is always best to err on the side of caution, and keep a close eye on each section as you go.
With scalp bleach, it is quite normal for the head to itch and feel tight, however, your client may not be used to this, so be sure to check in with them regularly, and try to discourage scratching the scalp whilst the hair is processing.
The final section to be lightened is around the hairline. This is left until last as due to the proximity to the face and the natural heat this produces, it is likely to lighten the fastest.
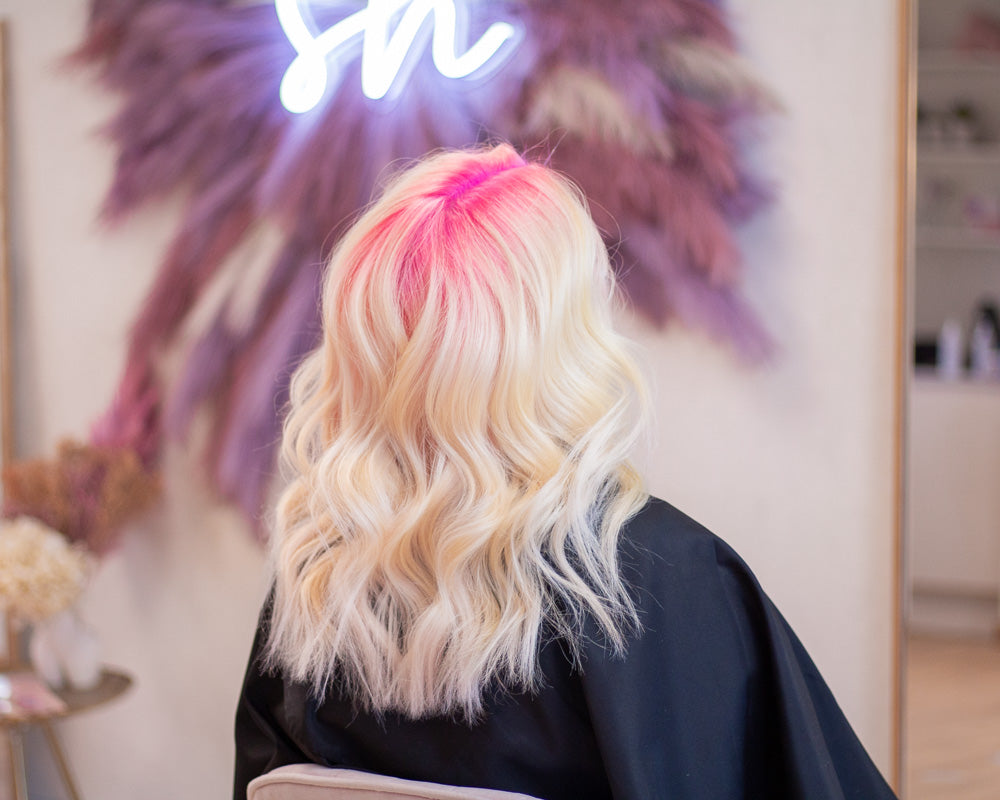
Now that the hair is lightened, it is time to start working on the fun pink root. Start by performing a test on a hidden piece of hair at the back of the head. This is to establish the colour and processing time and to check that the desired final colour is being achieved. In order to achieve a beautiful melted pink root, we are using two colours, bright pink for the root, and pastel pink for just below the root.

Starting from the bottom of the head, have both of your colours mixed up, and apply your bold colour to the root, and then use your pastel colour to smudge into the bold colour, and pull it slightly down the shaft of the hair. Each section needs to be fully saturated at the roots, however when flipping the section over to ensure full saturation, use foil to project the hair above, so no colour accidentally transfers through.
Once you have completed the whole head, leave it to develop before rinsing. Always rinse with cool water, as this helps fashion colour last longer. Then wash the hair with shampoo and conditioner, we are using the SimplyHair shampoo and Conditioner which is sulphate free, in order to ensure the colour lasts, and then you are ready to style!