Skip to content


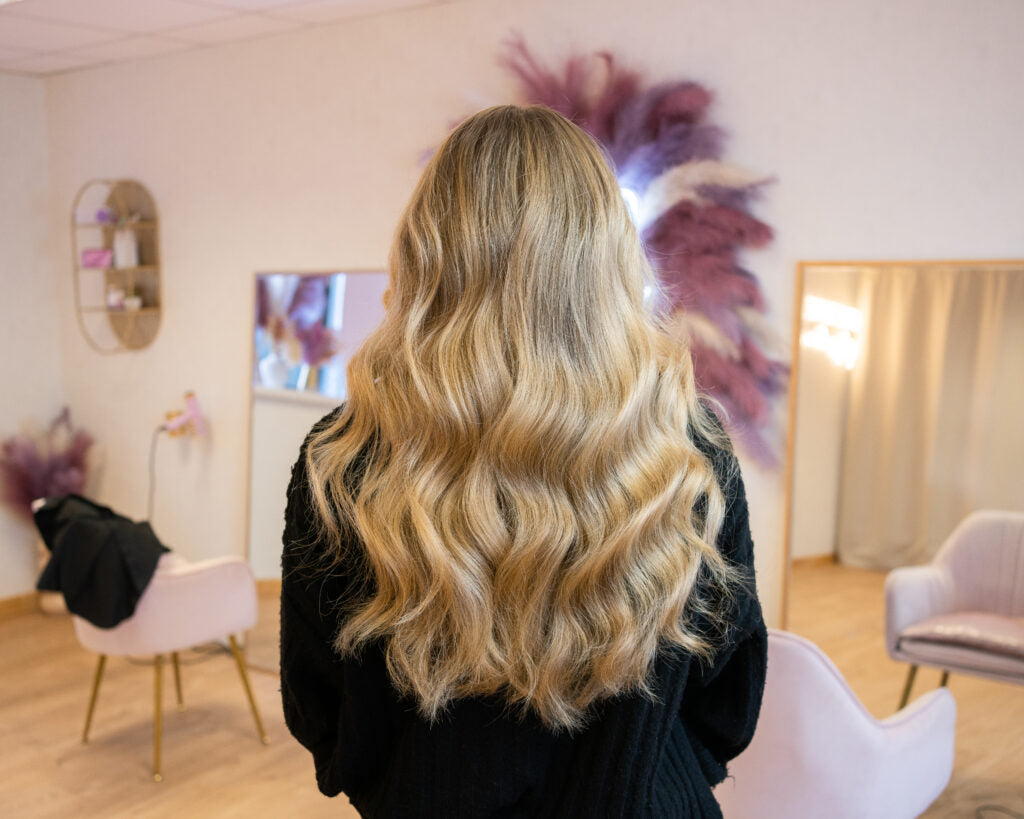
Colour Correction for Blending Stripey Highlights
When it comes to blonding work, every stylist will have a different style and technique. What will work and look incredible for one client won't necessarily have the same impact on another; this was the case for our client. She looked for a similar colour to @matildadjerf's hair and didn't feel that her current colour was quite hitting the mark.
To achieve a soft, warm blonde like Matilda Djerf, we needed to blend all of her existing highlights and soften up any high contrasts in the hair for a beautiful all over honey shade.
Step 1: Start by sectioning off a large piece at the top of the head, equal amounts on each side of the parting. Then section at the ear, and finally down the centre.
Formula: We will be using Loreal Multi Techniques, 40g of 20 vol developer, 30g of powder and Olaplex.
Step 2: Start by taking a thin slice at an angle at the base of the head, weaving it into your first foil.

Step 3: Repeat this process up the hair, leaving out the very ends that are already very light.
Step 4: After two foils on each side, we place foils in the middle to ensure the foils cover the entire perimeter of the head.
Step 5: We move to a broken slice as we move up the head for greater dimension and coverage.
Step 6: Now that we have completed a few rows of foils, gather all of the hair that has not been put into foils, use the tipping out technique to backcomb this section, weave a broken slice and apple your formula. This will help to even out the colour and brighten the overall look.

Step 7: Repeat this process up the back of the head until you meet the are you sectioned away at the top, remembering to tip out after every 3-4 foils.
Step 8: Once you have completed the back sections, you can move onto the front, weaving some babylights around the face to give a beautiful face frame. After the first couple of foils, you can revert to the broken slice technique, and again, remember to tip out after every three foils.
Step 9: Now, you can move onto your top section, continuing with your broken slice, sectioning parallel to the parting, in long slices, and again not forgetting to tip out as you go.
Step 10: Leave the foils to develop, checking on the bottom foils applied first as this will be the fastest to lift.

Step 11: Once developed, you can remove the foils at the basin, rinse and shampoo.
Step 12: Apply your conditioner and return to the chair to gently detangle the hair. Once detangled, return to the basin to rinse thoroughly.
Step 13: We are toning the hair with Redken Shades EQ in colours 07GB, 07M and 07NB at the roots, and 08WG, 09AA, 09G and 09NB at the mid-lengths and ends.

Step 14: Apply your root toner at the chair, using a tint brush and then using a hairbrush to slightly pull the root toner into the mid-lengths.
Step 15: Once the roots are complete, return to the basin to apply your toner to the mid-lengths and ends, using a hairbrush to brush the product through the hair to ensure even distribution. Leave to develop before washing the hair for a final time.
You are now ready to style!