Skip to content


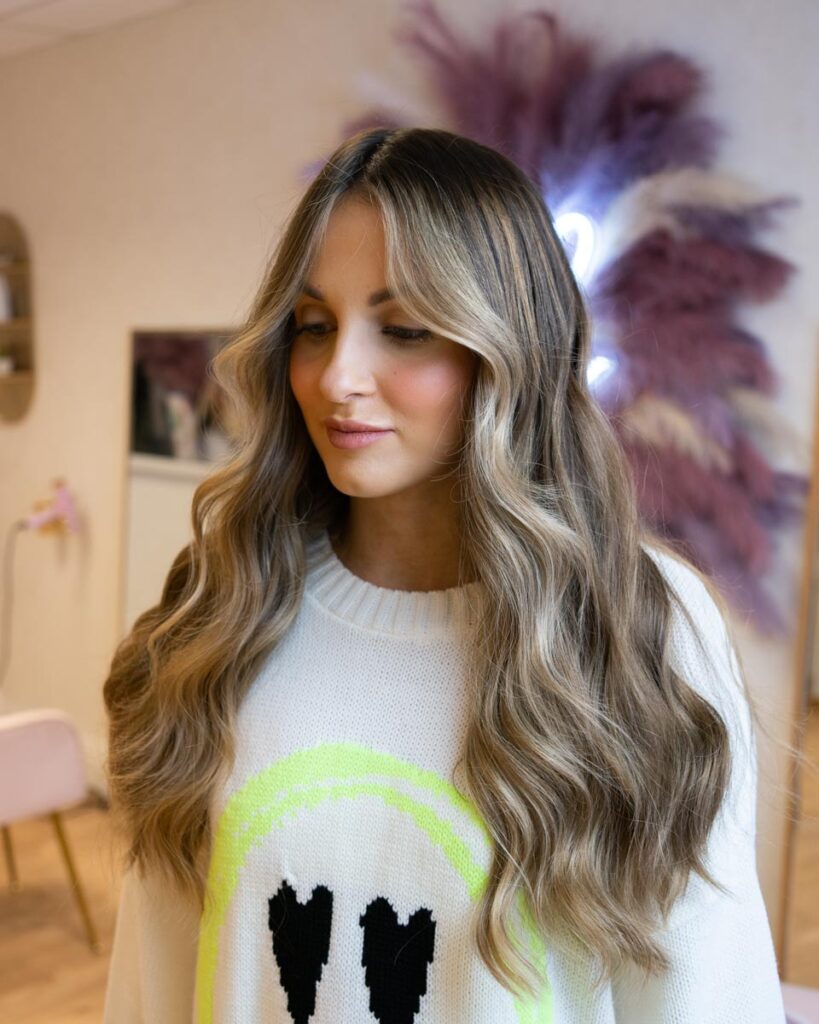
Subtle Soft Face Frame & Highlights on Brunette Hair
Adding dimension to hair colour doesn't have to be about the extreme and high contrasts. Sometimes adding some very soft and subtle dimensions can have a striking impact on the overall look, which we wanted to create for our client, Jade from Salon Magazine!
She already had some grown out balayage on her virgin roots, so we needed to work with this existing colour for a beautiful balanced finished look.
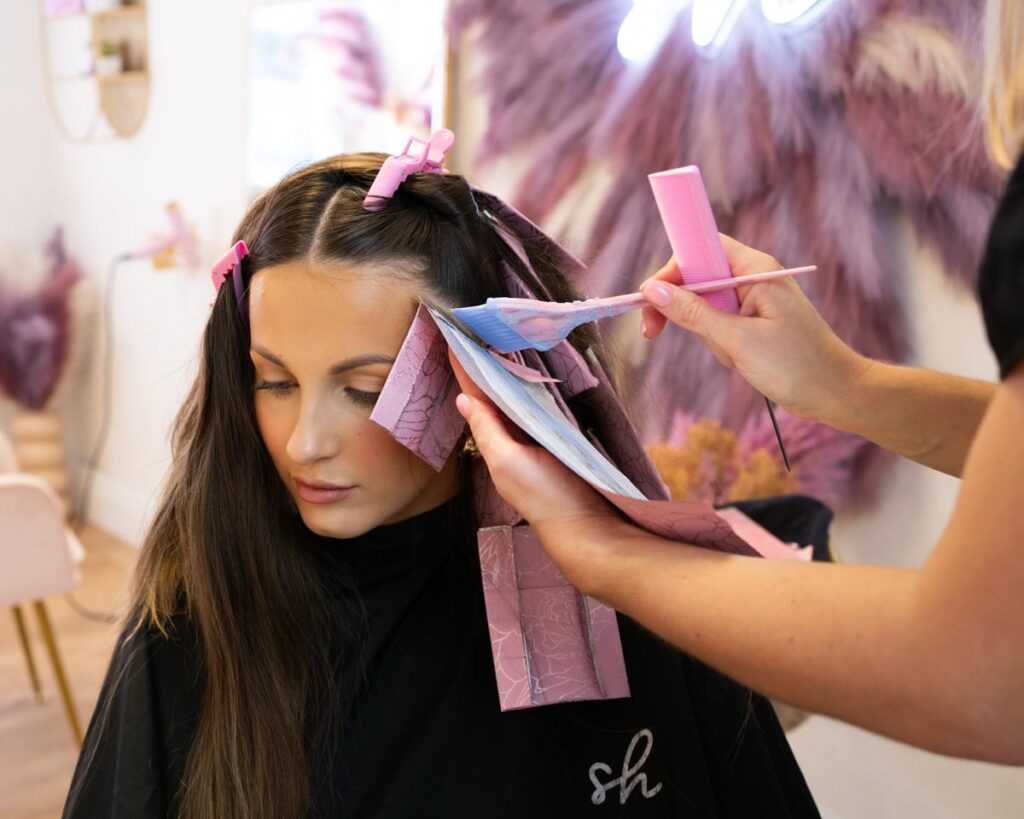
Step 1: We started by sectioning our clients super long hair, parting the front sections behind the ear and clipping forward to begin to work on the back.
Step 2: For our formula, we will be using Loreal Multitechniques 40g of 6%/20 vol developer, 30g of powder and olaplex.


Step 3: Starting with babylights around the hairline, we place our foils at an angle and use a balayage board to apply our bleach to the hair and foil. We are leaving the very ends of the hair out as these are already relatively light, and we don't want to over-process them.
Step 4: Once we have added our two hairline foils at the back, we can move on to a standard weave throughout the back of the head, adding a foil in the middle between the two sides to cover the entire perimeter of the head.
Step 5: Once you have three foils on top of one another, you can use the tipping out technique to grab the hair that's not been put into the foils, then backcombing and weaving into some foil. This gives a beautiful depth of colour to the overall look. As we will be applying bleach to the tips on these pieces, it is essential to keep a close eye on how they develop as the hair is lighter at the ends.
Step 6: Once halfway up the back of the head, switch to a broken slice to add more dimensions and depth to the colour.
Step 7: Continue the tipping out technique for every three foils, using the broken slice as your weaving method.
Step 8: Once you have completed the back section, you can move onto the sides. Start with babylights around the face frame, angled towards the face, and continue with the tipping technique after you have completed three foils.
Step 9: Once you have a sufficient number of babylights around the hairline, you can move back to your broken slice.
Step 10: Close to the natural parting, use backcombing to defuse any demarcation at the top of the head for a beautiful natural finish.
Step 11: Let the foil develop, checking on the colour periodically. Once ready, you can remove some of the back foils left longest and carefully rinse these while the rest of the hair develops.

Step 12: Work your way around the head, removing the foils that have developed and rinse the hair until the foils are removed. Wash and condition the hair thoroughly.
Step 13: Gently detangle the hair ready for your toner. We will be using RedKen Shades EQ in 04NB, 05N and 04M for the roots, 7GB and 6NW for the mid-lengths and ends, and 9NB, 9G and 9AA for the face frame.
Step 14: Apply your toner to the roots first, using a tint brush to ensure thorough coverage. Use a brush to pull the toner down through to the mid-lengths of the hair.
Step 15: Apply your mid-length formula to the mids and ends using a tint brush, leaving the front pieces of the hair out, and again brushing the toner through the hair with a hairbrush.
Step 16: Rinse the toner out at the basin, leaving the front pieces clear.
Step 17: Now, you can apply your face frame toner at the basin, leave it to develop and rinse.
Step 18: You are now ready to blowdry and style!