Skip to content


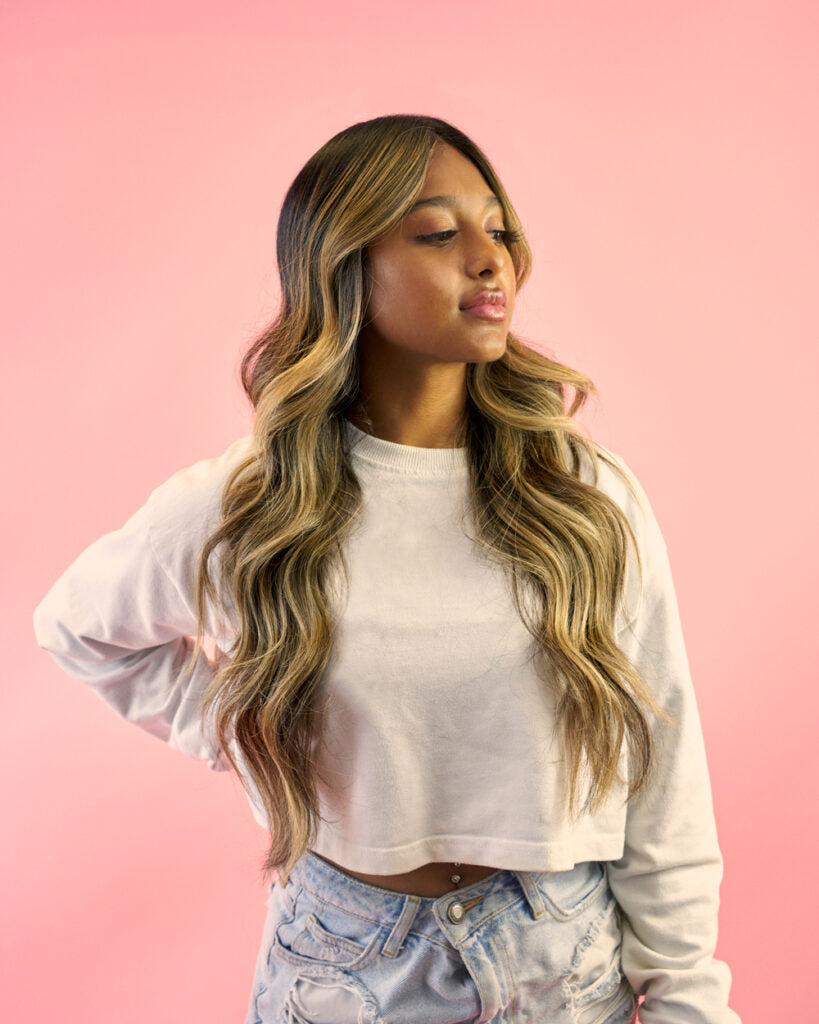
High Contrast Balayage Tutorial
When you have a client looking for a balayage style with naturally dark hair, it is important to find a balance between achieving the final look without compromising the hairs health or creating too stark of a contrast between the naturally dark hair and the lightened pieces.
For our client, we combined a broken slice weave with a tipping out technique to achieve a natural finish that compliments her existing colour.
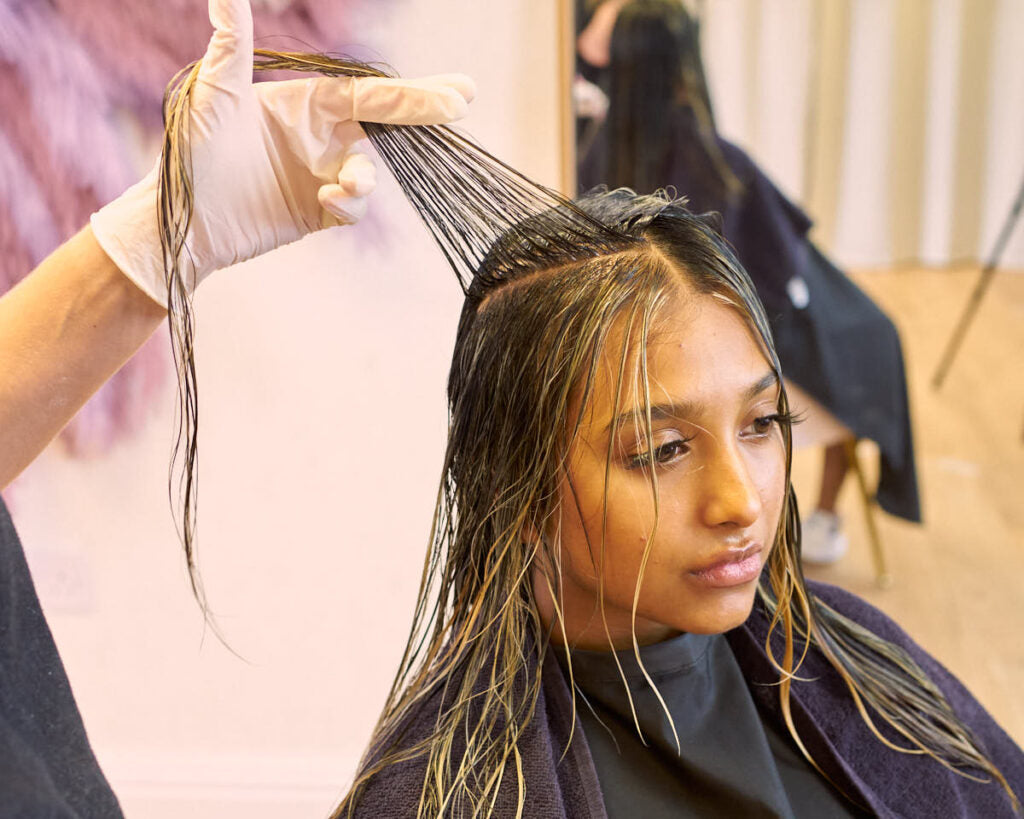
Step 1: Divide The Hair Into Sections
Begin by dividing into 2 sections, working one half at a time.
We will be using a formula of 40g 6%/20 Vol BlondeMe peroxide, 30g of BlondeMe Powder and the appropriate amount of Olaplex to help keep the hair healthy.

Step 2: Apply the Bleach
Starting at the nape of the neck at an angle, weave a broken slice and backcomb from around 1 inch of the root. This will ensure there is an uneven demarcation line which gives a more natural finished look.
When applying the bleach to each section of hair, brush the bleach downwards towards the ends, and then upwards towards the roots, further helping to increase the uneven demarcation line between the lightened hair and the client's natural hair.
Repeat this process as you work your way up the section.

Step 3: Use A Tipping Out Process
Once you have placed 3 foils, you will want to begin the tipping out process. This means that you will gather all of the hair that has not been put into the foils, weave this section of hair, backcomb, and then place it into the foil. This helps give a greater depth of colour overall, as well as again helping with a natural demarcation line between the lifted hair and the natural colour.
Step 4: Babylights To Frame The Face
Move your way up the back of the head, tipping out after every 3rd foil. Once you reach the top of the ear where your sections now incorporate the front hairline, switch to babylights for the foils that frame the face, and ensure you are angling the pieces so that the foils point towards the face.
Once you have framed the face with babylights, you can return to the broken slice.
Once the entire first section is finished, you can move on to the other side, and repeat the process, ensuring you are continually checking how the first side is developing.
Step 5: Removing The Foils
Once the first section has developed, you can remove these foils at the basin and rinse, whilst allowing the other side to continue lifting the match.
Once the other side has lifted to the same level, remove these foils also and rinse the hair thoroughly.
Step 6: Washing The Hair
Wash the hair using Olaplex Shampoo and rinse, followed by conditioner however do not rinse this out. Our client has very long natural hair, therefore we will use the conditioner to help us full brush through the hair. Once the hair is smoothed and free from any tangles, you can wash out the conditioner.
Step 7: Toning
Now it's time to tone our lifted hair, using RedKenEQ Shades, 09NB (10g), 07GB (10g), 09AA (10g), as well as 25g Clear and 50g Gloss. Apply at the roots first using a tint brush, and use a hairbrush to pull the toner through the lengths. Once the roots are complete, in large sections apply your toner through to the end. Leave the toner to saturate before thoroughly rinsing clear.
You are now ready to style and cut your client's hair, with beautiful high contrast, naturally blended balayage.